How To Add and Configure Product Tags
Using Tags to Search for Products
A primary use for product Tags is to search for a product category or a product with a particular attribute.
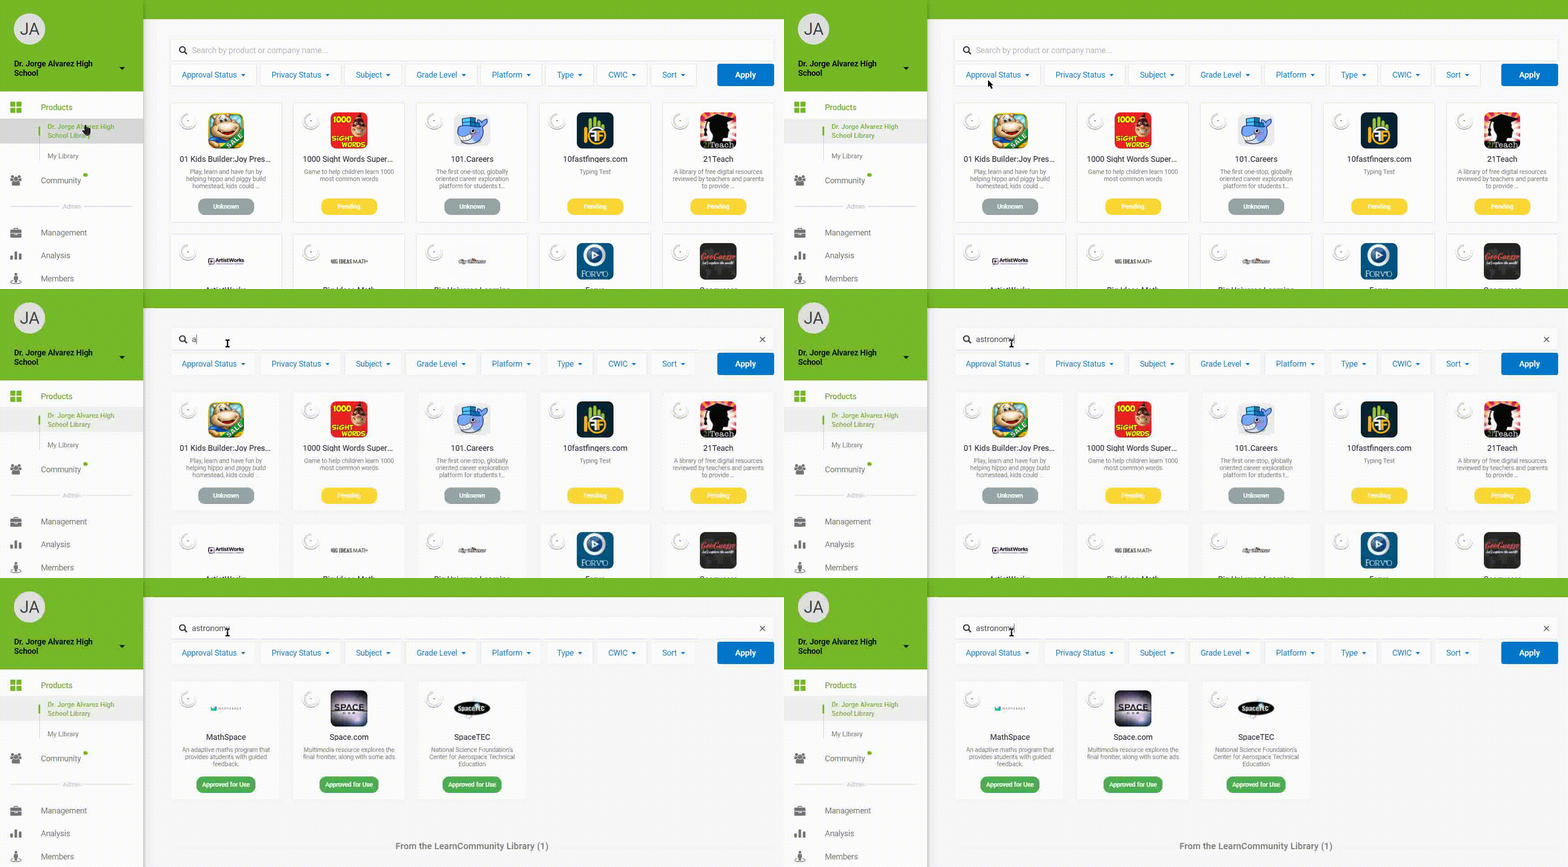
In the search boxes in the Management tab, the product library, and the Public Product Library (PPL), searching the name of the tag will return all products associated with that tag (as well as any products whose name includes the tagged word).

When searching in the product library for "astronomy" products, the products tagged with the "astronomy" tag will be displayed.
Adding a Tag
Administrators can create tags and associate them with products to help with searching, labeling, and managing other metadata through the platform.

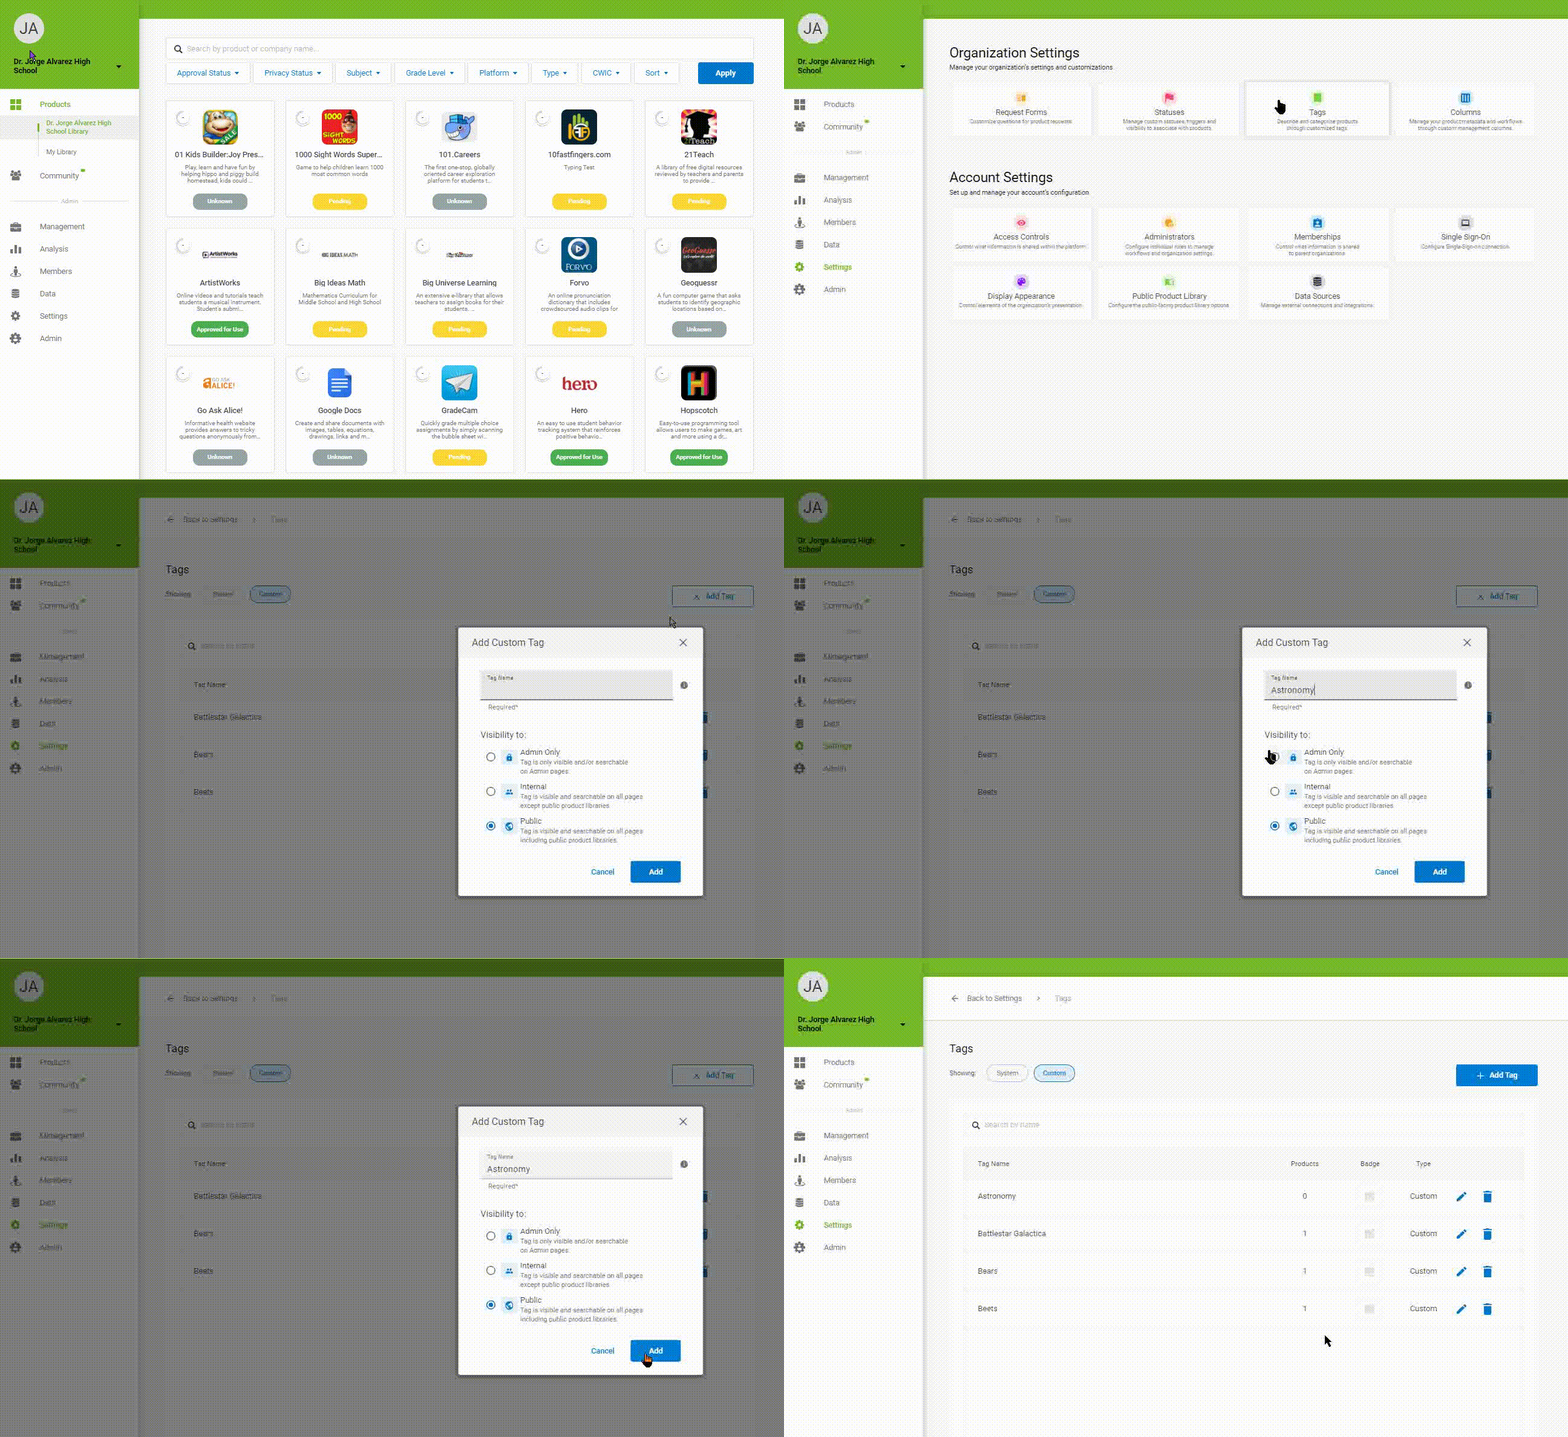
To add a new tag to your organization, navigate to Settings > Tags. From there, select Add Tag
A pop-up will guide you through adding a tag.
- Add your tag name
- Set your tag visibility
- Admin Only - is limited to admin pages. Searching for your tag on other pages will not return tagged results. This is useful for behind-the-scenes metadata or process markers like “Pending Privacy Review”.
- Internal - this will be visible to educators, but not in the Public Product Library (PPL). This is useful for internal codes like “Level 3 Support”.
- Public - this tagging will return results across the entire product, including the PPL.
Editing, Deleting, and Hiding Tags
Editing a Tag
You can edit a tag's name and visibility level by navigating to Settings > Tags > Edit.

Deleting a Tag
Deleting a group is accomplished by selecting the delete icon
Hiding a Tag
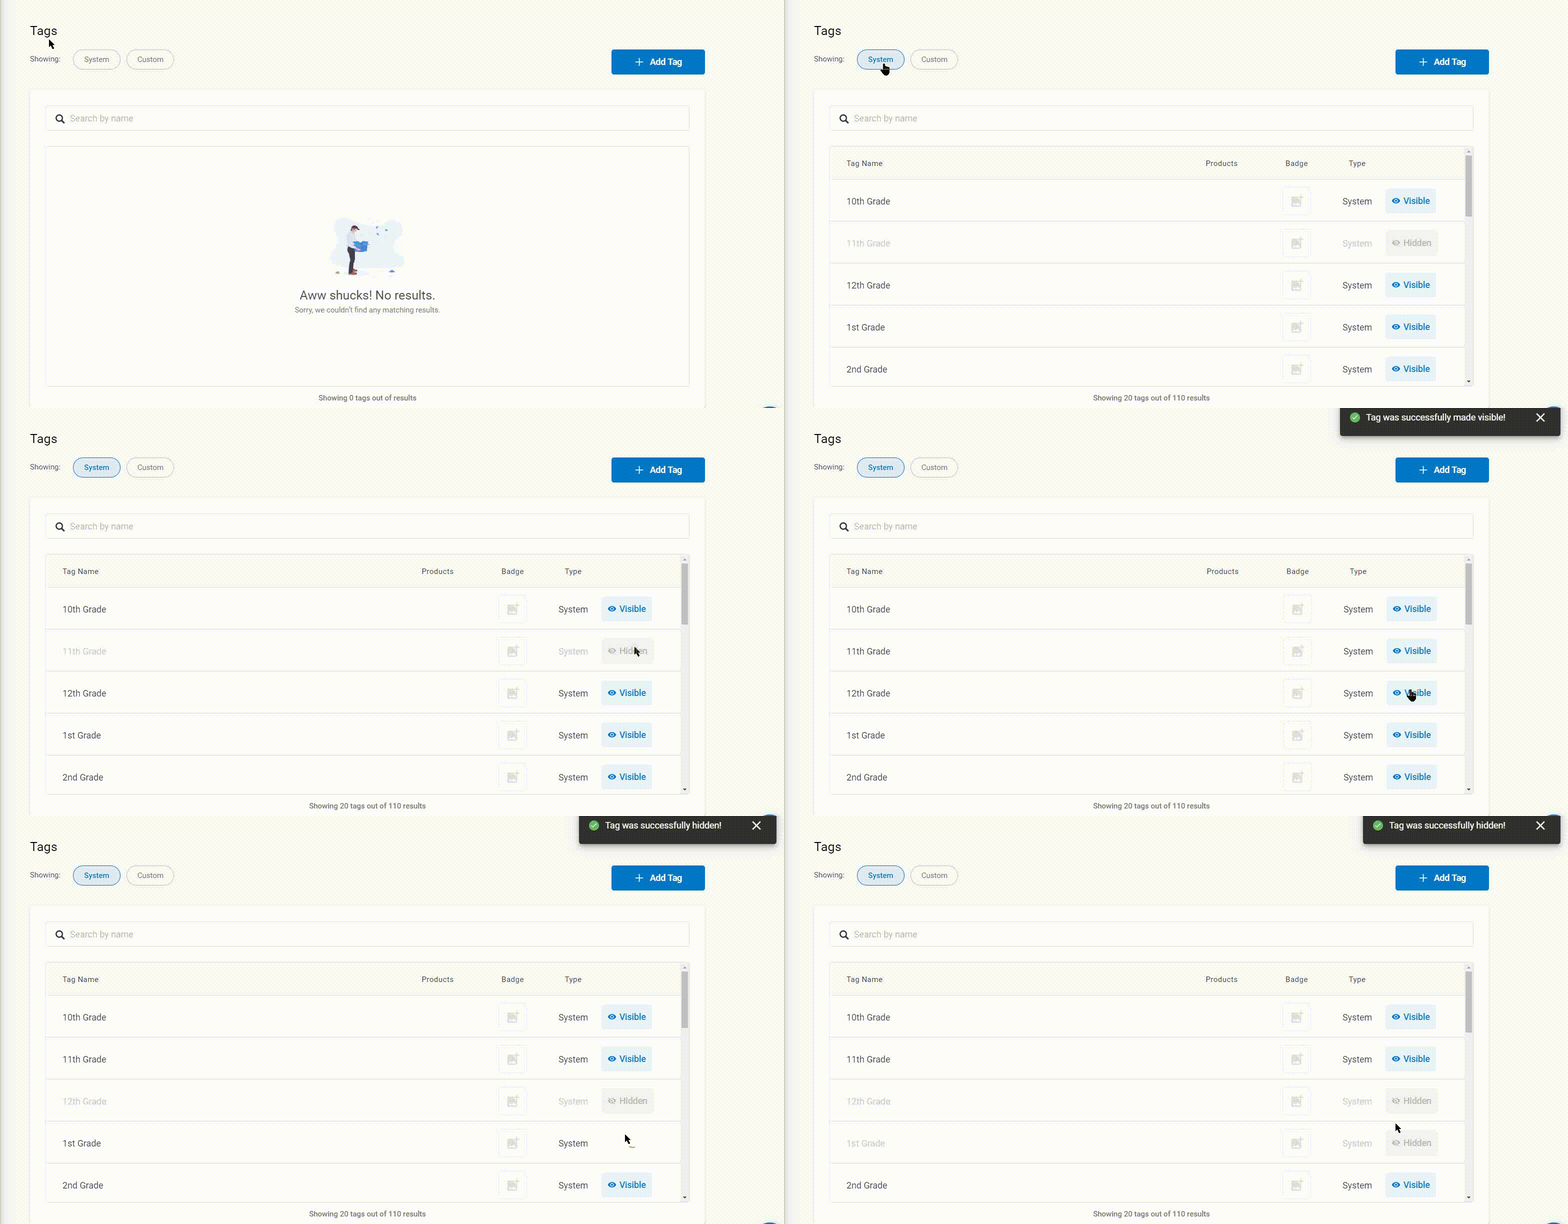
System tags (created by LearnPlatform) cannot be removed, but they can be hidden. Hiding a System tag will remove it from the list of options to tag or show/hide and will no longer be searchable throughout the product.

Adding a Badge (or Image) to a Tag
Tags can have images, called badges, associated with them that will show up in special places across the platform.
- You can associate an image by selecting the dotted “add image” icon in the badge column or selecting an existing image. Each tag, including system tags, can support one badge.
- The text will show under the image when a user hovers over the badge
- To remove, just select “Remove Badge”
Adding a Definition to a Tag
Navigate to Settings > Tags, find the tag you would like to define. Select “Add” from the Details column.
.
From there a pop-up will appear with an input for your definition. Add the definition and select “Add”.
You may now modify the definition by selecting “Definition” in the Details column.
Assigning Tags to a Product
To assign tags to a product go to Management > [Product] > Edit and go to the Tags section of the page.
- System Tags - System tags are created and assigned to the product by LearnPlatform. See "Hiding a Tag" above.
- Custom Tags - Custom tags include all tags that you (and your organization) have created and any system tags available that LearnPlatform has not associated with the product (e.g. if a product is missing a "Social Studies" tag, which is a System tag, you can select this one and apply it to that product).
- Any System Tags that were hidden in the Settings > Tags page would not be displayed in this list nor in the System Tags section
- Hiding/Showing System Tags - If your organization disagrees with the default tagging or has a narrower use than the default tagging, you may disassociate that tag and product for your organization on a per-product basis.
- Viewing/Removing Custom Tags - To associate a custom or system tag with a product that does not have it, select it from the list. Both custom tags and custom tagging associations will show up in this section and can be removed by simply selecting the “x” in the individual tags.
- Assigning Single Select Custom Tags (not pictured)- Some custom tags might belong to a single select tag group. These groups only allow one of the member tags to be assigned to a product. They will be denoted with an “S” icon. When you assign a tag from one of these tag groups, any tags from that same tag group will be removed from the tool.
