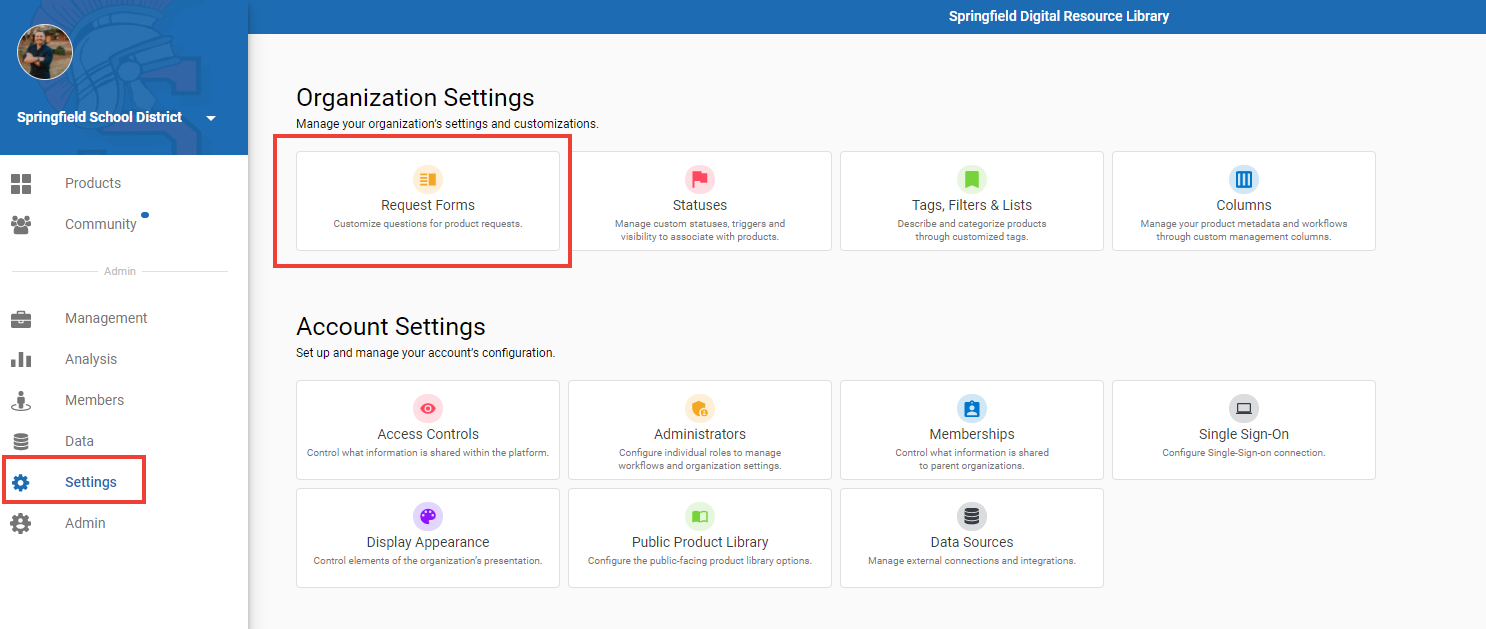
How To Customize Your Request Form
The first step to set up the product request process is to customize your product request forms to include all the information you need to make an informed decision about approving a product.
To customize a request form, access the Settings tab > Request Forms.

The system will include a default Request Form.
To create a new request form, click on the Create New Request Form or duplicate the existing System Default request form.
When creating a form, make sure you include a Request Form Name. The requestor's name and product names are required fields.
When entering questions into the form, you have the option of including free text, multi-select, multiple choice, rating scale, and other types of questions. After you have included all the questions in your form, make sure to Preview the questions and hit Save.
Assigning Request Forms to Product Statuses
You can assign request forms for specific statuses or set as Organization Default.
For example, in the Sample Form in the image above, the request form will only appear for product requests that have an Unknown status in the library. Request forms can be included while creating or modifying a product status by going to:
Settings > Statuses > Edit > Assign Form to Status
When creating and editing custom forms, organizations can drag-and-drop the questions into nearly any order they choose.
Reordering Custom Questions
When editing custom forms, to reorder the questions, simply drag and drop the questions by clicking and holding on the six dots on the left of the question and moving it to the place you would like it to be.
Sharing Forms with Member Organizations
When creating and editing custom forms, parent organizations can choose to share their form with member organizations.
Sharing a Form with a Member Organization
To share a custom form with a member organization, navigate to Settings > Access Controls > Request Form Settings. In the table showing custom forms that you have created, toggle the switch in the Share Form column for the form that you would like to share.
That form will now be visible to member organizations. It will not be assigned to a status nor will it be active until the member organization configures it.
Using a Shared Form
To use a shared form, as the member organization, navigate to Settings > Access Controls > Request Form Settings. All shared forms will appear with the owner listed.
By default, no status will be assigned to the shared form. Member organizations can use this form directly, or they can duplicate the form to further customize the questions.
Using the Shared Form Directly
To use the form directly as shared, simply assign a status that will trigger it, or set it as your new default form.
Benefits to this approach:
- More centralized management: The form updates when the master is updated. So, for example, if the district changes or adds a question, schools using the shared form directly will see those changes immediately.
- The form will be removed if the parent organization removes sharing or deletes it. In this case the member organization’s workflow will revert to the form that they had set as their default form and they will get a message in that table alerting them to the removed form
Duplicating the Shared Form
Another option for member organizations is to use the shared form as a template, duplicate the form, and add their own questions (optional).
Benefits to this approach:
- More local control: The form will not change or be removed while it is in use.
- This allows the option of including more or different questions while not rebuilding from scratch.
